I figured I wanted something about 5 inches by 7 inches because most of the dies came in packages about that size, but not anything too much bigger. And I found something at one of our local paper stores. First I found the sleeves which are 8 1/2" tall by 5 1/2" wide. After looking at several different binders that would accommodate that size sleeve, I ended up with ten (10) binders in all.
- TIP: Decide what you want in a binder
- Binder Spine - Tab in a sleeve or use a label to tape onto the binder spine (I went with the Tab in a sleeve)
- Front of Binder - Sleeve with room for paper to identify what is in the binder or not sleeve, but you can tape some paper on top of the binder (I went with the sleeve on the front so I could easily change when I add or remove or change dies to another binder.)
I don't have my Dies sorted by brand, but by type from Christmas and Holidays to Scenes and Letters & #s. I have ten (10) binders in all. If I change a die or dies to another binder, it's easy to change the front cover because I can take it out and put a new typed sheet in the front sleeve.
Here are a couple of my stamp and die combination sets. I keep the stamps and dies in one sleeve so they are together and easy to find.
Below iare the new Christmas Mice dies on the back side of the stamp set . When I stamp and die-cut images, I put them into a small plastic bag that closes which goes into the same sleeve as the stamp and die set.
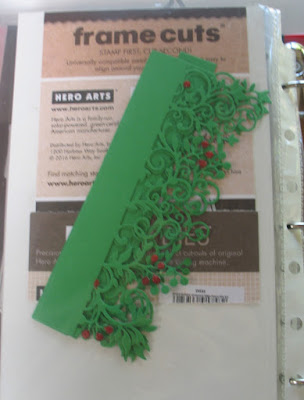
The new Holiday Greenery Edge Fancy Die has its own place of honor in my Christmas Binder with some die-cuts already to go..
Die Binder Front
I don't have every die listed on the front unless there is room to do so. I based binder names on the length of the name I could fit on the binder spine when stored and placed so I could see the binder title when stored. I made a list of all dies in each binder and put those lists in sheet protectors with a metal ring to keep them together. Anytime I'm not sure of what is in a binder, I pull my lists. Now that I'm thinking about it, I just may put that list into alphabetical order with the name of the book so I can just look something up alphabetically. See, there's always another way of doing things.
I don't know if you would like to try something like this or your current system is working for you. Mine wasn't, so I thought I'd share what I'm using now.
The card below published November 3rd is the result of using my binders to hold dies and die-cuts.
Remember to use my discount code Arlene15 to get 15% off your purchase of $25 or more.
Are you on social media? We are! Please join us on Twitter, Instagram and Facebook? so you don't miss any fun promotions or new challenge announcements!


Please join us in this month’s "Give Thanks" challenge. As you know, we’ve changed our rules a bit and participants are no longer required to use Hero Arts products to enter our challenges. Each month we feature a ‘Digi of the Month’ which will be the prize offered to our randomly-chosen challenge winner from our Hero Arts store. Our current monthly challenge can always be found in the menu bar, and runs from the 1st to last day of the month

The a2z scrapbooking store carries a wide variety of Hero Arts products! Get discounted new releases, sales, grab bags & more. Proceeds from our store benefit Celiac & Behcets disease foundations. Use my discount code Arlene15 to get 15% off your purchase of $25 or more. If you're looking for a Hero Arts product you don't see in store, use the Request Custom Order button from with-in the shop.

Hero Arts Christmas Mice stamps and dies set on A2Z Scrapbooking
Hero Arts Holiday Greenery Edge Fancy Die
Hero Arts Coffee Cup Tags Stamp & Cut (discontinued stamps and dies)
Assorted alphabet & Number sets
Binders big enough to use hold 51/2 inch X 81/2 inch sheet proctors
51/2 inch X 81/2 inch sheet proctors
Vagabond die cut machine


2 comments:
So neat and organized!! Thanks for sharing Arlene!
Thank You for sharing your article, This is an interesting & informative blog. It is very useful for the developer like me.
ดูหนัง
Post a Comment