Saturday, March 29, 2014

CCC for March

I can now show you what I sent to Lisa Haines for Deborah's CCC March exchange.  Deborah has a Card Chain Challenge at the beginning of every month.  You should stop on by her place.

My favorite stencil and it's by Dreamweaver stencils.  I used a trick I learned in the Clean and Simple one layer card workshop here.  I die-cut a circle out of yellow paper, stamped it with a great phrase, then die cut a circle out of the blue note card.  I taped copy paper to the back of the front panel and just popped the yellow circle in to stick onto the copy paper.  Easy peasy, but I love how that works.


Close-up shot

Hope you like this.  It was fun to color and try my hand at inlaid die-cuts.

Tuesday, March 25, 2014

A bit of CUTE!

Little Blue Button Stamps has some very cute images and I love this one.  I would never have thought of die-cutting this house or cat in that flowery cardstock if I hadn't already had it out on the desk.  The dry embossing folder was backward when I put the paper in, but I rather like the unusual indentations for this card as well as the whimsical patterns, colors, and papers.  Hope you think this is fun too..

Close-up

Have a great day out there!

Sunday, March 23, 2014

Sunshine and Spring

Welcome to another Little Blue Button Stamps day!  I love the way this cute paper reminds me of spring.and sunshine and happiness.  A little, no scratch that, a LOT of dry embossing give the backgrounds lots of depth without adding pop dots until the very top panel.  

I guess you could say this little gal is a favorite of mine.  Hope you are enjoying your stamping time and would like to try a Little Blue Button stamping too.  Here's a bit of SUNSHINE to add to your day!

Close-up of Sally loves me

Tuesday, March 18, 2014

One Layer Class - Masking

I did not have time to try any of Day 5 or Day 6 example techniques until one card last night and one today.  Time consuming for me.  I do think my Masked checkerboard came out well, however I had to shorten the card because...... the masking tape I was using was old and it took off the color on an area toward the bottom of the card.  I was almost done too, just 4 more stripes.  I just couldn't think of throwing out the card because of one little problem.  My solution on a late night was to cut off the bottom and let all the distress inks dry before embossing the sentiments. I used the Hero Arts "Enjoy Today" clear stamp set (CL759).  These are two sentiments, but I love how they go together so well.


Close-up of sentiment.  The sentiment does not fade into the background because the stripes are not quite as dark as they appear here - same as the objects reflected in this mirror may be closer than they appear.


Next card
Masking and using Versamark to ink up open surfaces.  I used think Washi tape to create narrow separations on this card.  I covered the sentiment panel entirely.  I really don't have this technique down and I think I might do something like this on a much smaller scale, rather than an entire card.  The dark color triangles are not black but a DEEP dark green.  The sentiment is stamped directly onto the note card front. 
I hope you enjoyed these examples of two of the ideas on Days 5 and 6.


Sunday, March 16, 2014

A Little Blue Button Scrapling

Here is a scrapling from one of Little Blue Button Stamps, the Die Cut Divas'March 2014 sponsor.  I cut one 2 3/4th inch by 4 inch piece off a card I didn't like and bingo!  A scrapling was born.  Remember, this is not a full size card.  I love little card so much I don't want to give it away.  I created the brick wall on which she is sitting by coloring Copic marker T1 across and then creating bricks by using Copic marker T2 and then continue T2 across the entire bottom of the card panel.  I used a white pen to put froth on her drink. I think she's adorable.

From ABOUT.COM:
"Question: What is a Scrapling?
Crafters come up with all sorts of cool names for little bits of paper (such as the inchies, twinchie, and rinchie trio). Scrapling is another such term.
Answer: A quarter-size greeting card is typically 5.5 x 4.25 inches (the folded size). To make it into a square card, some crafters would cut 1.25 inches off the bottom. That little scrap of paper became known as ascrapling. Instead of throwing it away (it is usually very pretty, decorative paper), it is often used to craft mini cards, tags, and labels."
I see that the origin is none other than Hero Arts, here.

Update!  I am entering Oddball Art Stamp Company's first challenge.  Looks like it'll be fun.  The theme is to use a DIGI.  How cool is that?

Thursday, March 13, 2014

One Layer Cards - Don't You Love Classes

I'm taking the Online Card Classes, Clean and Simple One Layer Clards with Jennifer, Kristina, & Julie.  .  However, my cards are not clean and simple.  I really have tried.  LOL

I am going to do another scene and use only part of a stamp scene to make more of a white space.  Without further ado.  DAY ONE:  This is indeed a one layer paper card.  I die-cut the three ornaments out of that lovely blue tinted paper pattern and then die cut the blue panel. I lined the back of the cut out blue panel with regular copy paper covered with adhesive.  I then placed each patterned paper ornament into the blue panel where the missing blue ornaments came from.  Adding some metallic twine was perfect with just an addition of 2 clear gems and Stickles Glitter Glue.  I really like the way this turned out, but I don't think it's as Clean and Simple as should be.


I never used this Penny Black San Francisco scene before and really wanted to use it.  I couldn't find anything smaller yesterday and decided to go with it.  I'm happy with it, but indeed, there should be more white space for a true Clean and Simple card.  I really just hit some portions of the stamps with color (Copic markers) and used T0 and T1 on many of the buildings.  I could see my girlfriend and I sitting at a table in San Francisco having tea and chatting about what we want to do in the City.  We haven't been to the City in 8 years to shop.  It's only two hours away.  Yes, we do NEED to GO.

Close-up of the top scene

 Close-up of the two gals.  You can see it was just quick strokes of color
 Recipe:
Card One:
Spellbinders 2013 Heirloom Ornament (I used 3 out of 4 sizes)

Card Two:
Penny Black Slapstick/Cling (San Francisco)
De Nami Design (Mimi & Maddie)

Can't wait for time to do more!   Hope you have a great end of the week.  I'm entering this card in Addicted to Stamps Challenge Blog.
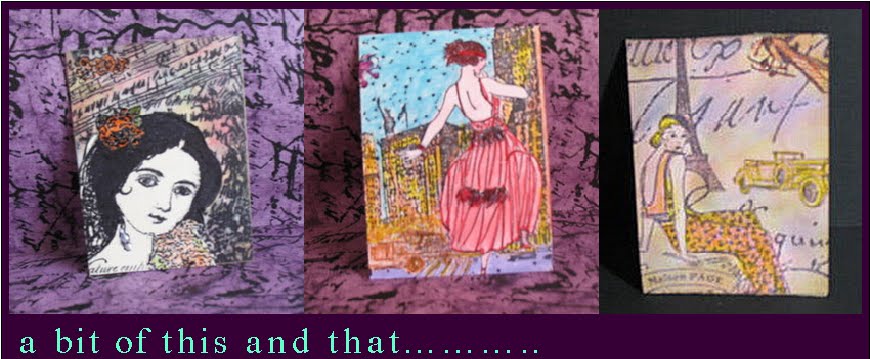
Talking to the Birds

What a sweet image from Little Blue Button Stamps.  She's lots of fun to color and add little die-cut birds.  I think they are my little blue birds of happiness.   Hoping you're having a glimpse of spring in your eyes.  Lots of fun in blue hair and bright red clothes.
VIVE LA DIFFÉRENCE

Many fun cards ahead of us.

Tuesday, March 11, 2014

Scramble at Hero Arts

I was able to participate in today's scramble at Hero Arts Flickr group and make a birthday card.  This may go to one of my three sons and maybe I'll design another similar card for my second son also born in April. To get on with the show.  here's my card!   I like the way it turned out.  Maybe a little different placement of the stars

I forgot to post this.  Well, Happy POSTING!

Hero Arts new clear set LOL CL737
Hero Arts Striped Pattern K5884
Spellbinders Star die cut
Glossy Accents
Cuttlebug folder James' Set

Sunday, March 9, 2014

Hair of a Different Hue

Little Blue Button Stamps is our sponsor for March.  A big thanks goes out to Little Blue Button Stamps.

Dawn shared Sally Loves Me with you yesterday and I thought I would share the same image, just with hair of a different color.  I just couldn't help but think of this cute gal with purple hair.  I thought it was a fun twist and made for a fun card.

Of course I used my Cuttlebug, one of my favorite and most used tools.
Additional items used:
Cricut Cuttlebug James' Set embossing folder
Distress ink - Worn Lipstick sponged on the embossed panel
Copic markers
Red Stickles
Baker's twine


Thursday, March 6, 2014

In Memory of a Friend

Tomorrow night I will go to a memorial in honor of a dear friend who retired several years ago.  She and I were founding members of the Third Street Masters Toastmasaters Club in Sacramento, CA.  She was the first President and was one of the best story tellers I knew.  She could make any problem lighter when she spoke.  We told stories of our memories of Diane on the following day after we heard of her passing at our meeting.  I'll give you an idea of the things that happened to her. She was locked out of the house where she was dog sitting.  After many searches for open windows, she actually climbed through the doggie door, not an easy thing to do when you're not a skinny minnie.  Imagine lying stuck half-way in and half-way out with a dog inside licking your face.  Smile, it was funny and I'll always remember the telling of it.

She was such a sweet person and we will miss her.  Here is the card I made to give to her family tomorrow.  I love the sweet simplicity of this flower and I thought it gave honor to her memory.

Close-up - the stamp actually does it all
After reading Virginia's post on water coloring this month, and the vivid colors she used as inspiration, I knew the stamp I wanted and the colors for this card.  I applied Distress inks Worn Lipstick, Fired Brick, Peeled Paint and Shabby Shutters, directly onto the stamp (I can tell where those colors are) spritzed the stamp with water, using the Tim Holtz mister onto water color paper. 

This will be a good memory for me and I think my entering this card in my friend, Virginia's water color challenge will be quite amusing for Dianne.   

Monday, March 3, 2014

You ROCK!

Be sure to check out Die Cut Divas' for our challenge this March as well as an interview today.  I love the challenge for March - LET'S EMBOSS IT!.  Don't you?  Here's a sample of one of our sponsor's new releases that I really enjoyed working with.

The image is so sweet!  I thoroughly enjoyed coloring this cute little gal, Miss Lilly and her bike from Little Blue Button Stamps.

I also used:
Hero Arts sentiment from LOL
Hero Arts Pattern Stripes
Hero Arts Manuscript Writing - an old wood block stamp
Copic markers
Distress Ink Worn Lipstick and Broken China

Saturday, March 1, 2014

Blue Button makes its first time debut with Die Cut Divas

 It's March and a new challenge is up at Die Cut Divas, so be sure to visit.  This is my card for the opening day, March 1st.  Can you emboss?  Then, this is for you!  EMBOSS IT.... any sort of embossing... dry, heat, pastes etc.  Just as long as you use your Die Cut Machine for something on you card.  Of course if you dry emboss... your in!  The sponsor for the Die Cut Divas is Little Blue Buttons Stamps


I used a cute little digital from the Little Blue Button new release for my card below.  I guess I'm still into pink from the February challenge.  I do like the way this little one turned out.  Sometimes you just fall into a design.  I had the purple panel on my desk and the idea blossomed into using it for my center piece.


Close-up.

I bet you're wondering if this is actually me at a young age, NOPE.  Hope you enjoy the challenge.