Friday, February 28, 2014

A Fun Project

Does anyone remember paper dolls?  Remember dressing up the paper dolls?  I vaguely remember them, but I was a tom boy and didn't really play with dolls.  Well, I guess I'm growing into the paper doll time of my life.  These Julie Nutting tags are 9 inches long and the doll is about 7 1/2 inches long.  This is Priscilla, a new Julie Nutting doll and my first attempt in handling the long legged gal and tags.  Along with the new doll, I used the Dreamweaver stencils Triangle Weave and Hot Air Balloon and a die, Leafless Tree.  I sponged the tree with Frayed Burlap and Vintage Photo - great combo.

I sponged Vintage Photo through the Triangle Weave randomly all over the card.  The Hot Air Balloon was used with paste and is colored with PanPastels.   Someone sent me some fine mesh and so I added several things to dress up the doll and the card.  I'm pleased with my first attempt.  I thought the stencils worked out wonderfully and I will be using more as I use the large tags to craft with.

See the hot air balloon peeping out from under the mesh.  The clothing, hat and boots are paper pieced onto the doll.  Lots of Glossy Accents on them too.

A last look at the gal and Leafless Tree die-cut. 

 A fun project!
Our last day of the month with Die Cut Divas.  Hannah's got the last post of the month for you over at
Die Cut Divas.

I am entering this tag in Simon Says Stamp - use paste


Thursday, February 27, 2014

CCC Reveal for February

Here is my card for the Society of Stampaholics where my friend, Deborah, hosts a card exchange.  Since I had to send a photo to her to post on her blog, she got to see the photo before she received the card. Bummer, but I really like the card.  The first thing I thought of, when I saw Deborah's sketch, was this fern die, which I bought a couple weeks ago, but had not had a chance to use.


Happy snail mail to Deborah who will be doing a reveal of all exchanged cards on the first of March.

Wednesday, February 26, 2014

Wild for Dreamweaver Stencils

Die Cut Divas Sponsor for February
Current Sponsor

OK, I went wild with Dreamweaver stencils!  
I love using the paste on a dark background.  The wispy clouds are made with using PanPastel Titanium White.  They're perfect for this technique.    This card is my favorite of all the Sailboat cards I've done.  

A gorgeous stencil that I've seen Paula use to good effect.  The "Thanks" card is colored with PanPastels.  The card on the right I used PanPastels to sponge over the Triangle Weave stencil.  I then sponged a VersaMark Ink pad randomly onto the Floral w Dots, (remove the stencil), then used Distress powders sprinkled on top and heat embossed.  I added a few more things to finish off my collage.

The panel that looks like clouds on which the stencil was applied is from a shopping bag from my LSS.  I used some think sheets of glitter paper to give it some pizzazz. 

Hope you enjoyed the Dreamweaver stencils.  I absolutely LOVE THEM.

Tuesday, February 25, 2014

I can, Toucan

Dreamweaver Stencils is sponsoring the Die Cut Divas' blog and I love the many different ways you can use those wonderful stencils and pastes.
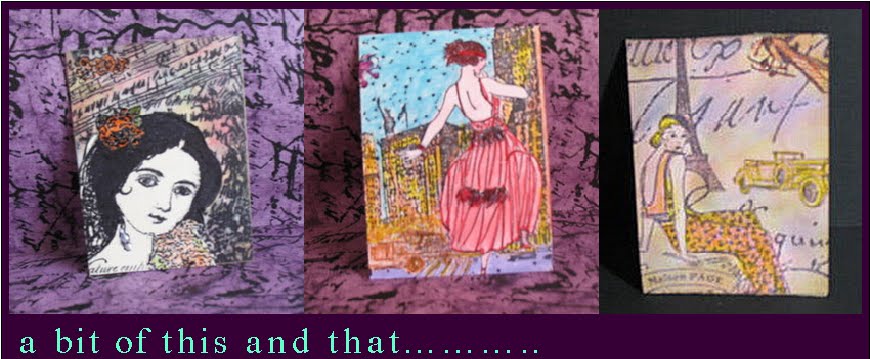
Hannah's the hostess with the mostest over at Die Cut Divas with a great February challenge for you.  This is a many faceted challenge.  On my card, I used PINK!
TIP
If you are using EMBOSSING PASTE.
1. Use removable tape to tape the stencil to the surface you will be embossing.
2. When spreading the paste across the taped stencil, start where you put down the first tape strip
3. You will be removing the tape in reverse order EXCEPT
4. Do NOT remove the last piece of tape yet, but
5. LIFT the stencil up (holding down the paper) as though it were on a hinge.  Your tape is the hinge
6. Now you can remove the stencil and tape
7. WASH the stencil  in soap and water immediately.  Wash on a flat surface so you don't bend the stencil
8. WASH the spreader at the same time.

See Stencils with Style to check out their stencils and embossing pastes.  Lots of tips and how to instructions..

This is a Dreamweaver stencil on which I spread the Dreamweaver Stencils embossing paste in white matte finish.  Please don't leave the stencil on while the paste is drying.  When the paste is dry (back does not feel cold anymore), put the stencil back on (if you want, you can use a strip of removable tape) and color with craft inks.  I used a small (SMALL) stipple brush to dab in the ink and brush on the raised areas.  The background is done on taskboard with Pan Pastels.  I used different colors of reds and greens and wiped Platinum over them to tone the colors down on the background.  The more you rub the Platinum, the shinier it gets.  The limb here looks purple, but it is brown.  I hope you like this.  I, myself, was so surprised at the wonderful results.

Tackboard is a non-warping natural wood product that is biodegradable, easy to cut and highly absorbent.  It creates strong bonds with any glue, can be sanded easily and accepts any water-based or solvent-based paint, stain or finish. You can apply any color of embossing paste.  It adheres best with liquid glues or strong 2-sided tape like Be Creative Tape.  Its unique pulp stratification allows forming over steam or after soaking in cold water.  It regains rigidity seconds after removal from steam or overnight if soaked.

I'm entering this card in Simon Says Stamp.com Challenge Blog - for their challenge, Paste.

Monday, February 24, 2014

First Sun Tea Day of 2014

I couldn't let the beautiful weekend go without making sun tea.  First I had to find where I hid the glass container.  Whew - spotted on top of the cabinet.

Sharing my sun tea with you!


Have a sun tea kind of day!

Be sure to visit the Die Cut Divas today for Hannah's post.

Sunday, February 23, 2014

Add a Little Glitter and Bubble your Paste!

Die Cut Divas' wonderful sponsor:
Current Sponsor

You can put glitter in your paste!  Try it.
I have loved using the Dreamweaver stencils.  Try them!  Not the flimsy little stencils, but sturdy metal stencils.  I'm still learning so many technicques.  Though you can't see the glitter.  I used some glitter in the paste for both of these cards.  A bit of Red Stickles on the berries for the first card adds a punch of color.

You can bubble your paste!
Can you see how bubbly the surface looks on the flower?  That's because I heated it with a heat tool to make it bubble.  This was my first attempt.  As you can see, I started at the bottom and wasn't so afraid as I neared the tops of the flowers.  You might give this a try AFTER the paste dries.  And I must say that I love Dreamweaver pastes.  I buy them at my LSS, The Stamp Art Shoppe in Roseville, California.

I hope you try this simple technique for something a little different.

Thursday, February 20, 2014

Hot Air Balloons - I'm finding them everywhere!

I teamed a Dreamweaver stencil with a new Hero Arts stamp set that I think is just the coolest set.  If I'd received this before my son's birthday, I'd have made something to send to him as he is a very technical guy - a math teacher.  Since I put a pink bow on this, I'm not giving him this one, but don't you just love the way Dreamweaver plays with Hero Arts?  I would love to have this balloon floating across my screen.

The black surface is all glossy (coated with Glossy Accents).  I cut out the center and replaced it with the card stock with my Dreamweaver balloon.   A more modern style here.  As you can tell, on this cell phone, my camera is ready!

This Dreamweaver hot air balloon is a combination of different things.  I mixed glitter and some Distress Powder with my Dreamweaver embossing paste (matte white) and applied with the Dreamweaver speader.  I also covered a few rows with Xmas Red Stickles.  It was fun creating a vintage/modern look.

Hope you like this mixed up card.  Rather a fun one.

I was having so much fun, I made two more cards with this wonderful stencil.  I'm really into the Dreamweaver pastes.  Looking at them, it's a wonder I didn't try to taste the creamy goodness.  This balloon below is floating through the clouds overlooking the world.   I used my PanPastels on the balloon.

This balloon card was a strange evolution.  I painted a kraft card with Distress paints, let them dry, put the Dreamweaver Triangle Weave stencil on and sponged the VersaMark pad directly on top of some of the weave, scattered Tattered Rose Distress embossing powder on top and heated with a heat tool.  I then placed the Hot Air Balloon Dreamweaver stencil on top, applied a mix of Dreamweaver white paste and Tim Holtz Distress embossing powder.  When dry, I used a heat tool.  I wanted the two white panels to stand out more, so applied some PanPastel white. Red Stickles and some kraft die cuts with the words "hey" and "Take a Break" complete the card.   A strange but kind of fun card.  I just couldn't get a good shot of the kraft die-cuts.

Dreamweaver Hot Air Balloon here!

Friday, February 14, 2014

Happy Valentine's day and a Happy Birthday to Die Cut Divas' Guest Artist

Happy Valentines Day to all and Happy Birthday to Die Cut Divas' guest for the month of February, Linda Wetterin.  Here is my birthday card.  As you can see, I LOVE this stencil.  I may have a yearning to go traveling.

Shouting out to everyone, Happy Valentine's Day and to Linda, Happy Birthday!

Recipe:
Dreamweaver Stencil LG755 Sailboat
Dreamweaver Embossing Past 
Distress Inks Broken China, Chipped Sapphire, & a little Worn Lipstick
Cuttlebug
Lifestyle Crafts dies (rectangles)
Spellbinders labels
PanPastels for coloring the paste


Wednesday, February 12, 2014

Some Sea Horses are pink.

Yep, some Seaorses are pink.  thought I'd run some blue across kraft paper and though I'm not totally into the color that resulted, I think it worked - silt and water surrounding a seahorse.  I couldn't help but dress the card up with butterflies and flowers in the form of ribbon.  I used a new set of dies from QuicKutz which contains 13 cutting dies - certainly some bang for your buck.

I applied Dreamweaver white matte paste to the smallest oval and let dry.  I've been loving the pure colors of my new PanPastels, this one being Permanent Red.  The color is as brilliant as shown.  And I love the way the Dreamweaver pastes go on.  I'm trying every stencil I received so I can see what techniques I want to experiment with.


Be sure to visit Die Cut Divas today for a visit with their guest who is doing a tutorial for us.

Monday, February 10, 2014

Die Cut Divas Guest Designer - go check Monday's post

It's time to get to know another artist through the Die Cut Divas' Guest Artist questions.  Don't be shy; just hop on over.

Remember that Die Cut Divas is in the midst of its February challenge.

I'm showing you a way to use the Dreamweaver Die today, but hop on over to visit our guest.

I found this print in my save package of images.  I don't remember where it's from, but it is lovely with some Copic markers darkening some of the colors and a red heart gem at the bottom right.  I used a Dreamweaver die and cut pink glitter paper (thin glitter paper) to frame the woman and make this a more earth goddess not card.  I used some Tim Holtz paper and die-cut it.  The blue card is stamped with a Hero Arts map which I inadvertently stamped upside down.  This card would have looked much different than is is now.  I like the way it turned out.  I used 1/2 of the tree.


Close-up
Visit the Die Cut Divas

Saturday, February 8, 2014

Scramble - Sometimes, it just works!

Hero Arts had a 90 minute scramble today and I got home from the Toastmasters' Leadership breakfast in time to participate.  You know how sometimes things come together and sometimes, time just blows by and you've got NOTHING.  Well, today, the colors inspired me.  I haven't used the color combo pink and silver in a long time.

I thought I had silver Distress Paint, but I didn't... however the brushed pewter looks silver to me, yet pewter too. I put up another photo of my card on Flickr which does not match the true color of the paper.  This photo directly below is the true color and you can see the note card has a silverish color as well as a great pattern.

I dabbed Distress Paint, Brushed Pewter, on the background and after it dried, I then used the Dreamweaver stencil to sponge Memento London Fog on some of the weave.  The pattern is from the Dreamweaver Stencil LJ912.Triangle Weave, which is one of my favorite stencil backgrounds.  I stamped a Hero Arts stamp K5517, in Distress Paint Brushed Pewter (stamp bought at Michaels), very similar to Silhoutte Grass, S5316 on the pink panel.  I had to stamp this several times across the panel.  The Hero Arts sentiment, Butterfly and Flower set CL750 had this great sentiment which fit perfectly. The pattern of the weave on the silver is amazing and a bit hard to catch.


Not the true color, but perhaps you can see the pattern more.

This really is quite stunning.

I hope you stopped over at Die Cut Divas to check out the winner of the first week of the challenge.   Some great cards!  I confess to having a fantastic time using my Dreamweaver Stencils.  I think the rest of the Divas at Die Cut Divas have also fallen in love with them. 

Have a great week

Wednesday, February 5, 2014

Sail Away

Dreamweaver is sponsoring Die Cut Divas (DCD).  Hannah is the hostess for February and she's got some striking, seriously special examples of using Dreamweaver stencils.  I've fallen in love with them since I started using them.  This Sailboat stencil is a fantastic scene, indescribably captivating.  We Divas are sharing our vision of this stencil and you won't believe the beauties on the blog challenge at Die Cut Divas.  Each one is different and I must say rather striking. 


.  This is one of my all-time favorites Dreamweaver stencils.    Here's where you can find the Sailboat.  The sailboat and clouds are all glittery with Perfect Pearls. 

I hope to see some Dreamweaver Stencils in use because they have so many different stencils to choose and lots of tutorials.  I'm so proud to be sharing the DCD stage with Hannah, this month's featured Artist, as well as fellow Divas, Paula and Dawn.  
Recipe:
Hero Arts note card
Hero Arts sentiment (Enjoy today)


Monday, February 3, 2014

Die Cut Divas = Happy Anniversary!

February 2013 was a turning point for Die Cut Divas and Hannah over at the Die Cut Divas has a great post in store for you.  This is my card honoring all the divas at home creating and entering our challenges.
Thank you all. 

Close-up of the Embossing Paste colored with PanPastels
.  
Recipte:
Dreamweaver stencil LL3035
Dreamweaver embossing paste - love this paste
Hero Arts frame
Hero Arts Pattern Stripes
PanPastels
Hero Arts Soft Cantaloupe ink on the background stamp
Kraft note card
Cuttlebug
Cuttlebug Olivia alphabet - Thanks - sentiment is a word on one of the plates
Black pearls
Washi Tape

Sunday, February 2, 2014

CCC card

The reveal is out at Society of Stampaholics right here!  This is the card I sent to Pat in Virginia.  This card exchange is so much fun and the February sign-ups are already up.  I am, of course going to participate. It's so much fun getting snail mail from a fellow stamp artist.  I have the card I received from Joy in Indiana up on the storage unit next to my computer.  It's at the height of my monitor and I look at it every day and it cheers me.  Go see the card she sent me at Debbie's blog, Society of Stampaholics. I loved putting this together.  I used the sketch part of the CCC and used a new die-cut that I really have been enjoying, Contempo Circle Border from Memory Box.

Almost forgotten!
I'd almost forgotten a card I actually meant to display for the Hero Arts "Make it Glitter" at Die Cut Divas in January.  I just took a photo today.  I used my new background stamp on the front.  I had blue some Hero Arts Shadow ink (soft sky) left on the stamp Pattern Stripes (K5884) and added Hero Arts Shadow ink soft blossom to the stamp.  The result is as you see it below.  The "a little" (CL758) stamp set stamp has so many uses and I chose to celebrate with "WINE" instead of "CHOCOLATE this time.  


 A close-up of the outside

The inside of the card.
Have a great day out there!

Saturday, February 1, 2014

Dreamweaver Kick-Off!

If you came here from Die Cut Divas', you know our February sponsor is Dreamweaver Stencils!  I've fallen in love with the Dreamweaver pastes.  I feel I've become adequate.

I needed a Wedding card and found in my nest of goodies sent by Dreamweaver Stencils this marvelous "Your Wedding" stencil.  I haven't needed a Wedding card in 5 years.  Perfect!   The background almost looks like hearts, but it's a triangle weave done with PanPastels (Permanent Red and  Hansa Yellow) lightly sponged over the weave stencil.  I thought a red color would stand out against the paler background and it does nicely.  Once my paste was dry, I put the "Your Wedding" stencil back on top and taped it down so it wouldn't move (USE REMOVABLE TAPE) and brushed Permanent Red PanPastel on top of the dry paste.  You can brush on inks, use Copic markers.  I am sending this off to a dear friend.


Close-up of the paste which I colored.

TIP
If you are using EMBOSSING PASTE.
1. Use removable tape to tape the stencil to the surface you will be embossing.
2. When spreading the paste across the taped stencil, start where you put down the first tape strip
3. You will be removing the tape in reverse order EXCEPT
4. Do NOT remove the tape yet, but
5. LIFT the stencil up (holding down the paper) as though it were on a hinge.  Your tape is the hinge
6. Now you can remove the stencil and tape
7. WASH the stencil  in soap and water immediately.  Wash on a flat surface so you don't bend the stencil
8. WASH the spreader at the same time.

See Stencils with Style to check out their stencils and embossing pastes.  Lots of tips and how to instructions..