I was visiting Joshua Jiraffe Designs today and followed her lead to a fantastic give-away from Siri. You won't believe the gorgeous papers and wonderful handmade papers. As I scrolled down the beautiful papers and peeked at the flowers, my first thought was, "I want these" and the second thought was "How do I get these?" and a posting will do it... it's all up to us... she will have her granny pick a name at the 3500th hit on her blog. Hurry on over and check this out.
Monday, April 27, 2009
Saturday, April 18, 2009
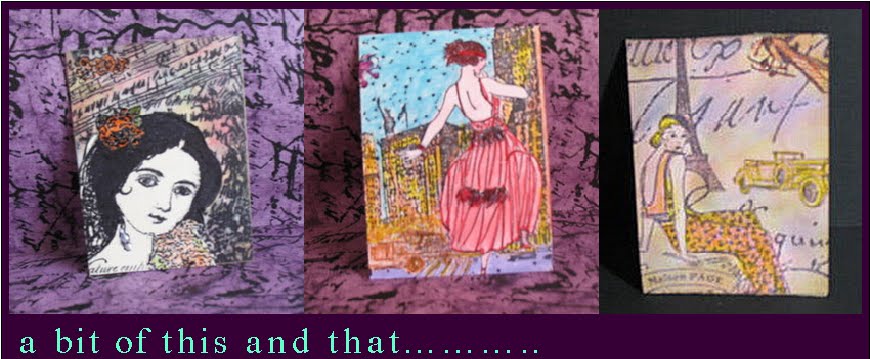
Paint Chips & ATCs
I've really enjoyed the Hero Arts blog and flickr group for over a year now... and we were challenged to use something other than just ol' paper just last week. Some of the gals in the flickr group are just amazing!!! All kinds of suggestions emerged... no - erupted! One of the suggestions was to use paint chips. Since I had to go to the hardware store anyway, I also dropped by the paint display area.... so many wonderful colors to choose from.
I never thought of "erasing" the printed colors on those little rascals... no... I cut them off... which was ok... here's the card I finished... not too shabby, but do I have a great site to direct you to .... after this demonstration of a simple paint chip card... ta da!
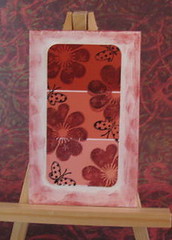
I was checking for different swaps on swap-bot, then checking some of the profiles, then some of the swaps they were in and found one that is too late to enter (waaaa!!), but which had a great link to Go Make Something on... what?... paint chips. Cutting on the diagonal, creating unusual cards, tags, ATCs are just some of the amazing ideas for paint chips - so you have got to check it out if you're a paper crafter. Go Make Something also has some great information on the most efficient way to get the most ATCs out of a regular 8 1/2" X 11" piece of paper too.
The back of your cards should contain your name, any contact information you wish to provide, e.g. Title of the ATC, Date the ATC was made, your name/email address or whatever method you might wish for the person to have to contact you later , and the number or series of the card. Some artists start numbering their cards with number 1, and just keep going. Others will do series numbering, such as 1 of 7 or 1/7. How you number is totally up to you. I haven't been numbering mine except when I made a series of tree sets of a particular style/method of crafting, then 1of 3, etc. I'm kind of wishing I had started off numbering them right away.
Oh well... do I start now by counting my flickr group... mmmmmmmmmmmmmmm... we'll see.
I never thought of "erasing" the printed colors on those little rascals... no... I cut them off... which was ok... here's the card I finished... not too shabby, but do I have a great site to direct you to .... after this demonstration of a simple paint chip card... ta da!
I was checking for different swaps on swap-bot, then checking some of the profiles, then some of the swaps they were in and found one that is too late to enter (waaaa!!), but which had a great link to Go Make Something on... what?... paint chips. Cutting on the diagonal, creating unusual cards, tags, ATCs are just some of the amazing ideas for paint chips - so you have got to check it out if you're a paper crafter. Go Make Something also has some great information on the most efficient way to get the most ATCs out of a regular 8 1/2" X 11" piece of paper too.
The back of your cards should contain your name, any contact information you wish to provide, e.g. Title of the ATC, Date the ATC was made, your name/email address or whatever method you might wish for the person to have to contact you later , and the number or series of the card. Some artists start numbering their cards with number 1, and just keep going. Others will do series numbering, such as 1 of 7 or 1/7. How you number is totally up to you. I haven't been numbering mine except when I made a series of tree sets of a particular style/method of crafting, then 1of 3, etc. I'm kind of wishing I had started off numbering them right away.
Oh well... do I start now by counting my flickr group... mmmmmmmmmmmmmmm... we'll see.
Friday, April 17, 2009
Cat Nap Fantasy - a Caardvark's Challenge entry
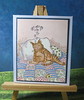
I have been coloring on this little quilt and the cat for awhile now. colored blue, then a week later, I colored pink, and so on. Sooo you see it's taken awhile... But then all of a sudden, the colors seemed to magically appear in my hands as I set to filling in the blanks... I guess filling in the squares is more applicable.
This is a glossy paper and I didn't know what I wanted to do with the area behind the cat at all... I'm happy it just kind of flowed.... upwards from the shadows. I always thought this image was so sweet, but I only ever colored this image twice and I was not real happy with it either time.
I have no idea what stamp company made this, all I know is I've had the stamped images for years! If anyone knows, please knock, but not too hard, because you might wake the sleeping kitty.
What can I say? Stamping Mathilda...
I joined Swap-bot about a month ago and have had a pleasant trading experience. My name is Clarian on swap-bot. I was certainly leery at first, but decided I'd get my feet wet by participating in some easy swaps. They have a rating system of 1 to 5, 5 being the highest rating and a bonus heart if the item you sent/made was above the expected. Here's some of the first few I've done:
- Email your partner your flickr photo address and for a heart, a few additional favorite flickr person's photos address.
- Send a naked postcard to 3 partners (naked - as not in an envelope... yes written on)
- Sender's Choice (ATC)to 2 partners
- Tree ATC
- Send 2 notecards with envelopes to 2 partners
You have to get your feet wet, so to speak. People don't want other people flaking on their trades, so that's why they have a rating system... Yes, all this to get to Stamping Mathilda...
I have joined 3 groups and on ATC Addicts Club I found a wonderful post on a folded container for ATCs. And guess where it took me? No guessing required when it concerns Stamping Mathilda and her most delightful, interesting and instructional blog.
If you'd like to try ATCs, there are many flickr groups that are fun and you might do some one-on-one trading at first. You send a message or write a note on the comment for the particular ATC you're interested in and ask to trade. I usually send an email. I'm picky about what I like and don't want something with just stickers on it... sorry to those I might offend, but that's just my likes and dislikes... I'm also not a fan of putting wings on a little girl and such...
Have fun visiting Stamping Mathilda and maybe make an ATC or few...
Thursday, April 16, 2009
Joshua Jiraffe Designs: Never done before --- “Blog Candy” offering!
Joshua Jiraffe Designs: Never done before --- “Blog Candy” offering!
I've never tried linking before, so let's hope this does what I think it does :)))
Check out Joshua Jiraffe Designs to see what she's giving away and leave a message if you want. Talented stamper seen on Hero Arts and Caardvarks. Who knows... she may be coming to your part of the country...
Remember to visit Joshua Jiraffe Designs. I'm hoping we'll get updates on the big move, aren't you?
Wednesday, April 15, 2009
Visiting a blog today
Of course I started the day visiting the Hero Arts flickr group to see all the wonderful cards and see if any inspiration might ooze its way into my drowsy head. It didn't... oh well.... I did find a wonderful card that shows how long a friendship can last... And I had to visit her blog... YAY!
Why don't you go visit and leave a little note for Sanne Andersen yourself. She's already updated her blog today with the cutest little frog and elephant cards for a new baby girl.
I also made my every Wednesday trip to The Society of Stamp and Scrap-aholics to see the spot-lighted guest of the week, Paula Laird, a wonderful person and talented stamper. Off to clean house... well, upload a couple photos and then go clean house... at some point in time today, I am going to clean house.
Tuesday, April 14, 2009
Stamping Mathilda's Fun Fold Card
I had wondered how Stamping Mathilda created her unusual folded cards. First I had to find out what size an A4 sheet of paper was... to the web! An A4 card is 210 × 297 mm, which is about 8.2677" X 11.69289" - so we can use an 8 1/2" X 11" sheet of paper... we Americans. Stamping Mathilda has a bit more paper to create with. I had to make a card today... couldn't wait.
Stamping Mathilda's Instructions: (my liberal spray of words in blue)
Fold in half on the 8 1/2" side so you have two long cards, not the way I would normally cut to make a notecard. I hope that makes sense. Cut in half, you have two folded cards now, which fit in a regular envelope and indeed they do. Score at 10,5 cm... that's 4.1 inches... You can decorate the narrow part (stamp, emboss, punch,...). You have to see how many ways she has used this card - like a shaker card, embossing and glueing shut... go check it out at Stamping Mathilda.
Tree Landscape ATC
I like the way this turned out.. I darkened the cardboard back with Distressed ink (Vintage Photo) adhered stamped and sponged background to the cardboard, then made zigzag lines about three times around the tree scape to create a wood frame look.
How I created the scene:
I cut a piece of white cardstock about 1/4' less all around than the Artist Trading Card (ATC) I was making. I just held the paper up to the card and cut it out on my paper cutter. I usually don't measure, unless I'm following instructions on a project - then I usually follow them strickly so I can see how it's done before I think of changing it. I knew what I wanted in a wide sense - a scene of trees on a landscape of green and a sky of blues and pinks.
I sponged green distressed ink on the bottom using a piece of torn copy paper to make the landscape look like gently rolling hills - took the same torn paper and sponged the sky, only I used several shades of blue, levander, pink, red, and yellow.
I stamped the line of trees (perfect for this size) on the sponged surface, darkened some of the trunks with brown marker as I thought the tree was too light with the color of distressed ink I used - Vintage Photo.
I'm going to swap this... even though I love it... and I hope the person who receives it likes it too.
Sunday, April 5, 2009
Just found a wonderful link for a bonbon box
On the Hero Arts Flickr group, Monika Reeck posted a link for a bonbon box and it's so simple and easy to make. The original blog is Mandys Kreativwelt, where you can find the wonderful bonbon box Mandy created.
I will try to translate the German into English here. Of course, I'm mostly using babblefish to do so. When I insert my comments I'll use a different color for the comment.
One needs paper in the masses 27.5 cms (10.8 in) x 21 cms (8.3 in) (you can take of course also greater or smaller) one folds all 5.5 cms (2.2 in) on a fold line.
Then one folds the paper like a harmonika (accordion). On the not so nice side (back), one draws 4 triangles in .... There are pictures that you can follow, step by step. You really don't need the translation.
Then one cuts out the triangles. Now paper is ready to stamp or paste something on. Glue the entire length of one side, no matter whether on the left or on the right and stick it together, thus you have a tube.
Then you notice the side parts snap automatically together. Loop tape around and it's ready. Of course you could use two-sided tape on the inside of the ends to give it a nicer finish. You can tie ribbon, yarn, string, whatever you fancy around the ends to finish it off.
Great little tutorial, easily followed from the photos. How nice it would be to give someone a homemade treat in this box. Have a great day!
Friday, April 3, 2009
Caardvarks challenge
Wednesday, April 1, 2009
Latest Cards
I have stamped one layer cards, but mostly non-Hero Arts (HA) stamps, so when the challenge went out for a one layer card this week, I really didn't want to do it... which surprised me.. well, no, it didn't... to be honest, I just knew it would be more work than I wanted to do... hahaha
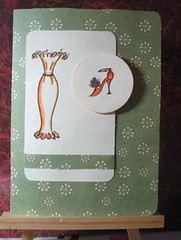
Here's a fairy (dearly love this stamp) that I stamped, colored and mailed to a wonderful person I've met through Flickr in Japan along with the second card here:


I love the fairy stamps from Stamps Happen. I just checked and I don't see very many now. The one I have must have been retired... she must have become a bit overwhelmed with taking care of all the flowers. The woman collage is by Inkadinkado - no name on the stamp.
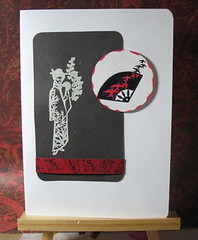
Now on to the HA card. I am pleased with the results, but I just didn't want to cut out the masks so I could do the background for the little dolls. Oh, well, it didn't hurt... much... and now I have the masks for future use. I used a torn piece of copy paper to hold against my card so that when I sponged the colors, there wasn't a straight line definition, but a more natural flow. I used the piece of copy paper with the torn edge facing down from the top of the card, moving the paper around the card, dabbing in greens for the bottom and blues, pinks, yellow for the top. I turned the torn part so it was on the bottom for some of the sky. The two dolls stand out so vividly against the background. I stamped the Slanted Tree onto the sponged background and masked images twice; the second stamping looks like little bushes. I lifted the masks and colored the dolls, fan, and tree. Voila!

Thank you for checking here.
Here's a fairy (dearly love this stamp) that I stamped, colored and mailed to a wonderful person I've met through Flickr in Japan along with the second card here:
I love the fairy stamps from Stamps Happen. I just checked and I don't see very many now. The one I have must have been retired... she must have become a bit overwhelmed with taking care of all the flowers. The woman collage is by Inkadinkado - no name on the stamp.
Now on to the HA card. I am pleased with the results, but I just didn't want to cut out the masks so I could do the background for the little dolls. Oh, well, it didn't hurt... much... and now I have the masks for future use. I used a torn piece of copy paper to hold against my card so that when I sponged the colors, there wasn't a straight line definition, but a more natural flow. I used the piece of copy paper with the torn edge facing down from the top of the card, moving the paper around the card, dabbing in greens for the bottom and blues, pinks, yellow for the top. I turned the torn part so it was on the bottom for some of the sky. The two dolls stand out so vividly against the background. I stamped the Slanted Tree onto the sponged background and masked images twice; the second stamping looks like little bushes. I lifted the masks and colored the dolls, fan, and tree. Voila!
Thank you for checking here.
Subscribe to:
Posts (Atom)